Add a Client
A Client is the end-business you run automations for — a dental clinic, a plumbing company, anyone reselling under your agency. You need at least one before you can request an agent.
Create the client
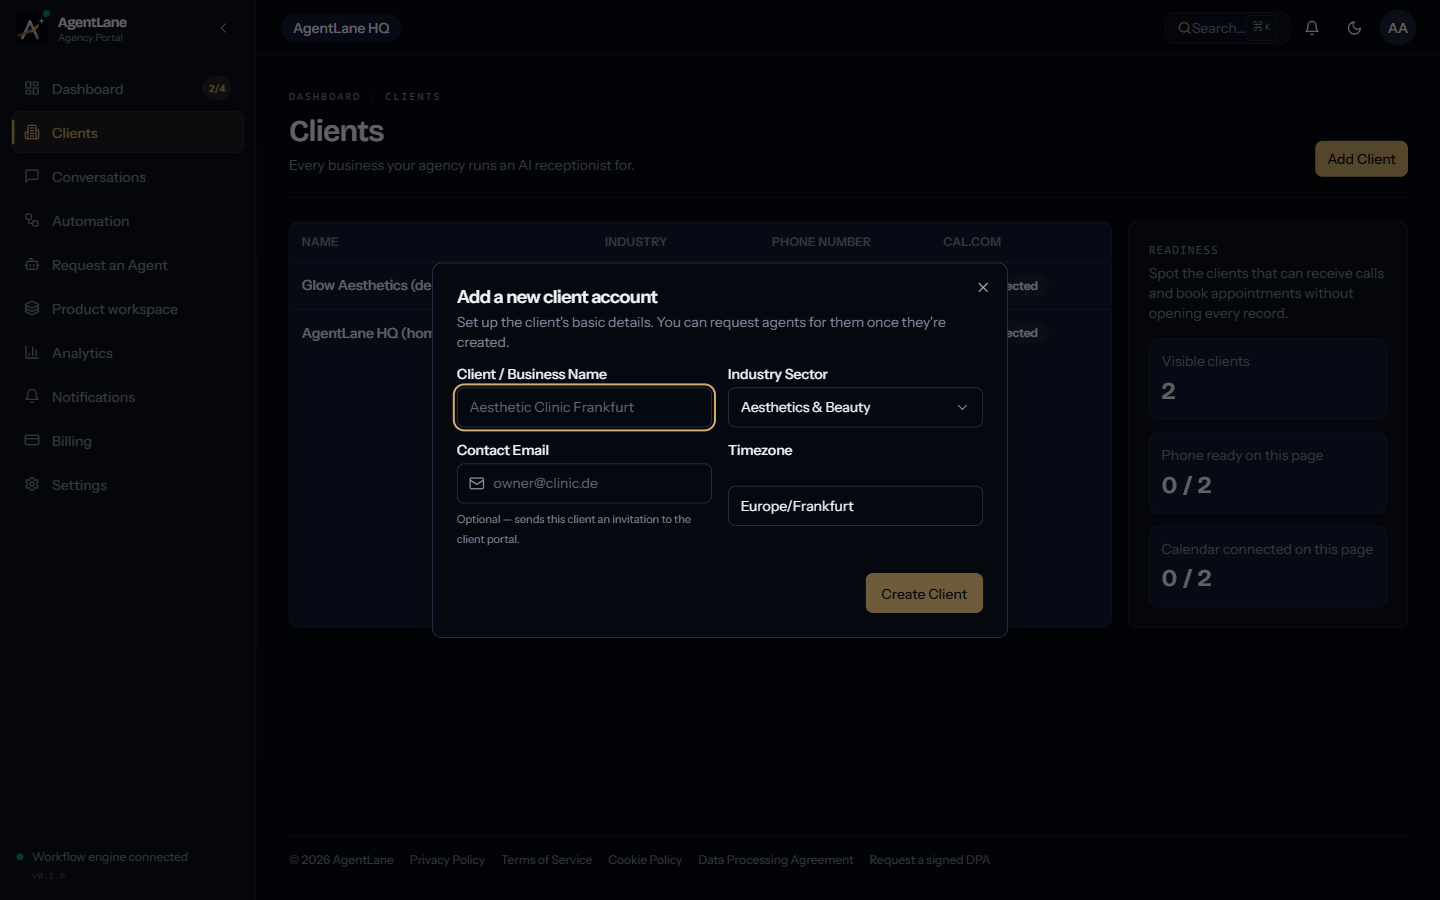
From Clients (/dashboard/clients), click Add Client. Fill in:
- Client / Business Name
- Industry Sector — a dropdown grouped into “Featured industries” (the verticals with real depth of content) and “More industries”
- Contact Email (optional) — if set, sends an invitation to the client portal immediately; if that email already has an account, the client is still created without error
- Timezone — free text, defaults to
Europe/Frankfurt
Fill in business hours
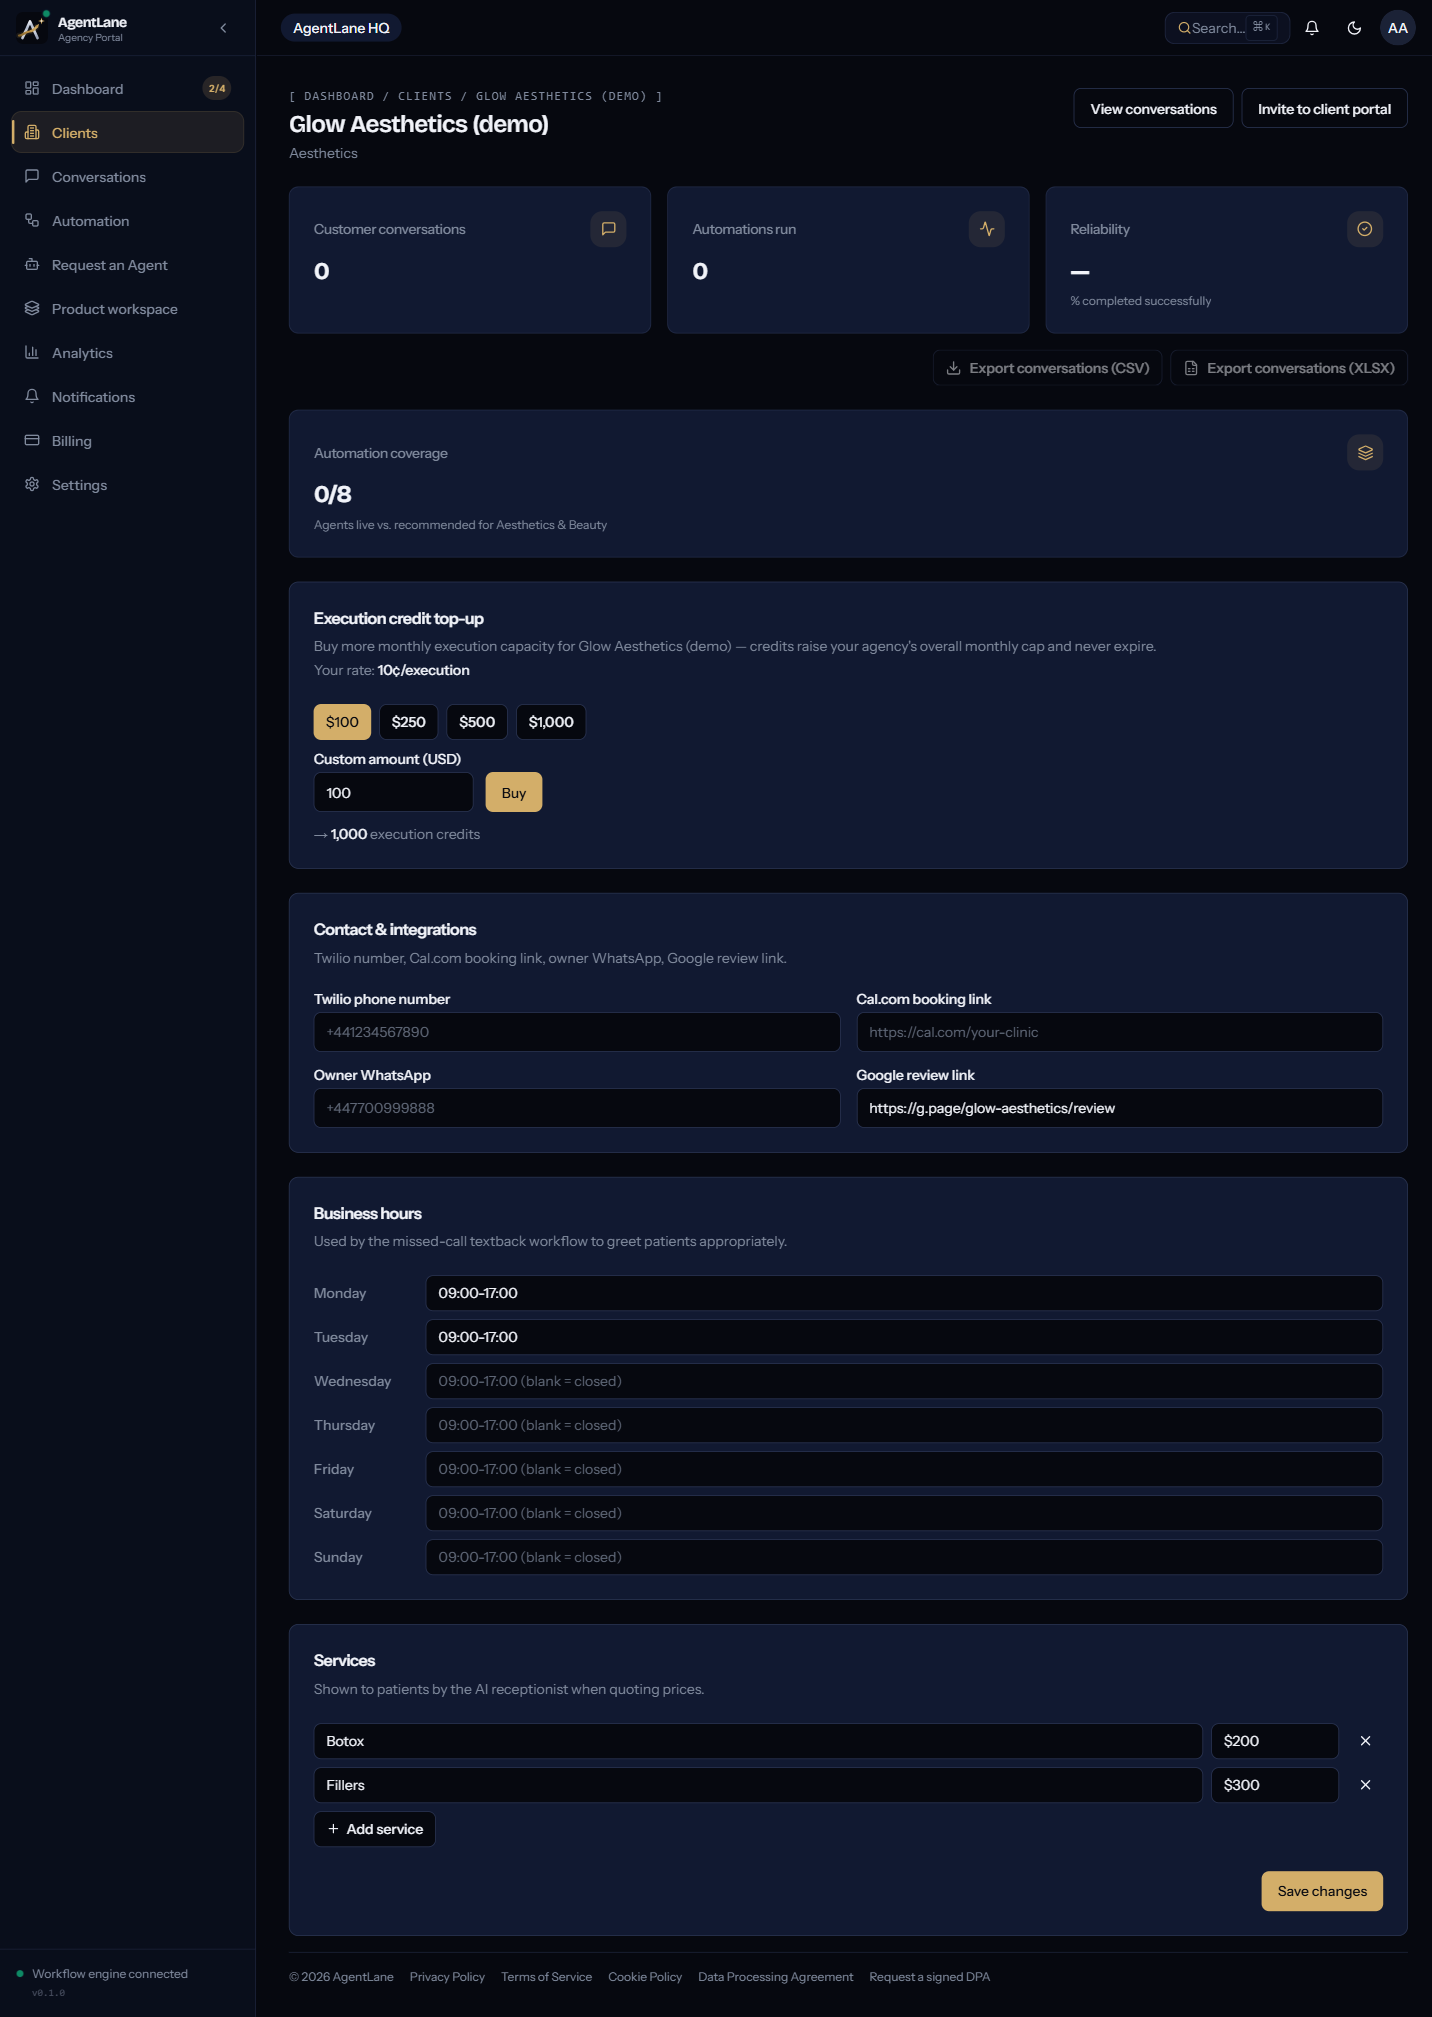
Open the new client’s detail page. Under Business hours, each day has a text field in HH:MM-HH:MM format (e.g. 09:00-17:00) — leave a day blank to mark it closed. This feeds the missed-call textback workflow’s greeting logic directly.
Add services and prices
Under Services, click Add service for each one — a name field and a price field (free text, e.g. “$200”). This is what the AI receptionist quotes when a caller asks about pricing.
Add contact & integration links
Under Contact & integrations: Twilio phone number, Cal.com booking link, owner WhatsApp, and Google review link. Click Save changes at the bottom of the Services card to persist all of it together.
Invite them to their own portal (optional, any time)
From the client detail page, click Invite to client portal to send a scoped login link — see Invite a client to their portal for what they see once they accept.
Next
Request an agent for this client — see Deploy your first agent.