Deploy Your First Agent
By the end of this page you’ll have a real client set up in AgentLane, a Lead Qualifier agent provisioned and live for them, and a way to watch it work. This is written for a Partner team member with the agency-scoped admin permission (not moderator — see Team permissions within a Partner). Elapsed time is realistically 30–45 minutes, most of it spent on your own Twilio/Cal.com account setup rather than anything AgentLane-specific.
Before you start
You’ll need:
- The
adminagency permission on your Partner account (notmoderator) — see Authentication & Security. - The client’s business hours, services/prices, and a way to reach them (their own phone or WhatsApp number).
- A Cal.com account with a booking link for that client.
- A Twilio phone number for that client (or one you’ll assign later).
- Either an Anthropic API key, or a Managed AI plan (which uses AgentLane’s own key automatically).
Create the client
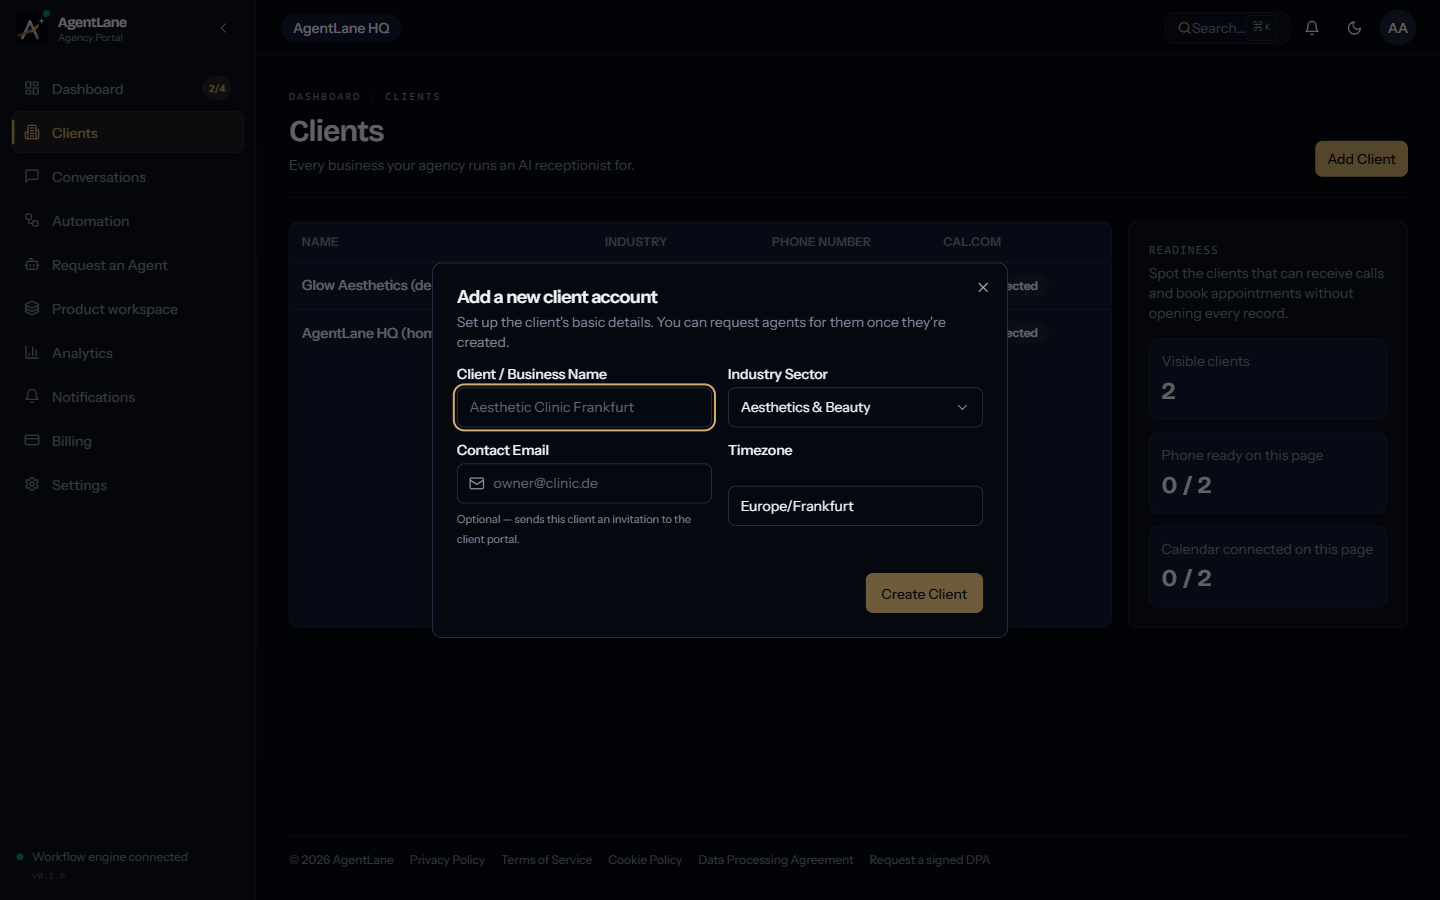
From Clients (/dashboard/clients), click Add Client. Fill in the Client / Business Name, pick an Industry Sector from the dropdown (featured industries are grouped above the rest), set a Timezone (defaults to Europe/Frankfurt), and optionally add a Contact Email — if you set one, AgentLane sends that address an invitation to the client portal immediately.
Fill in business hours and services
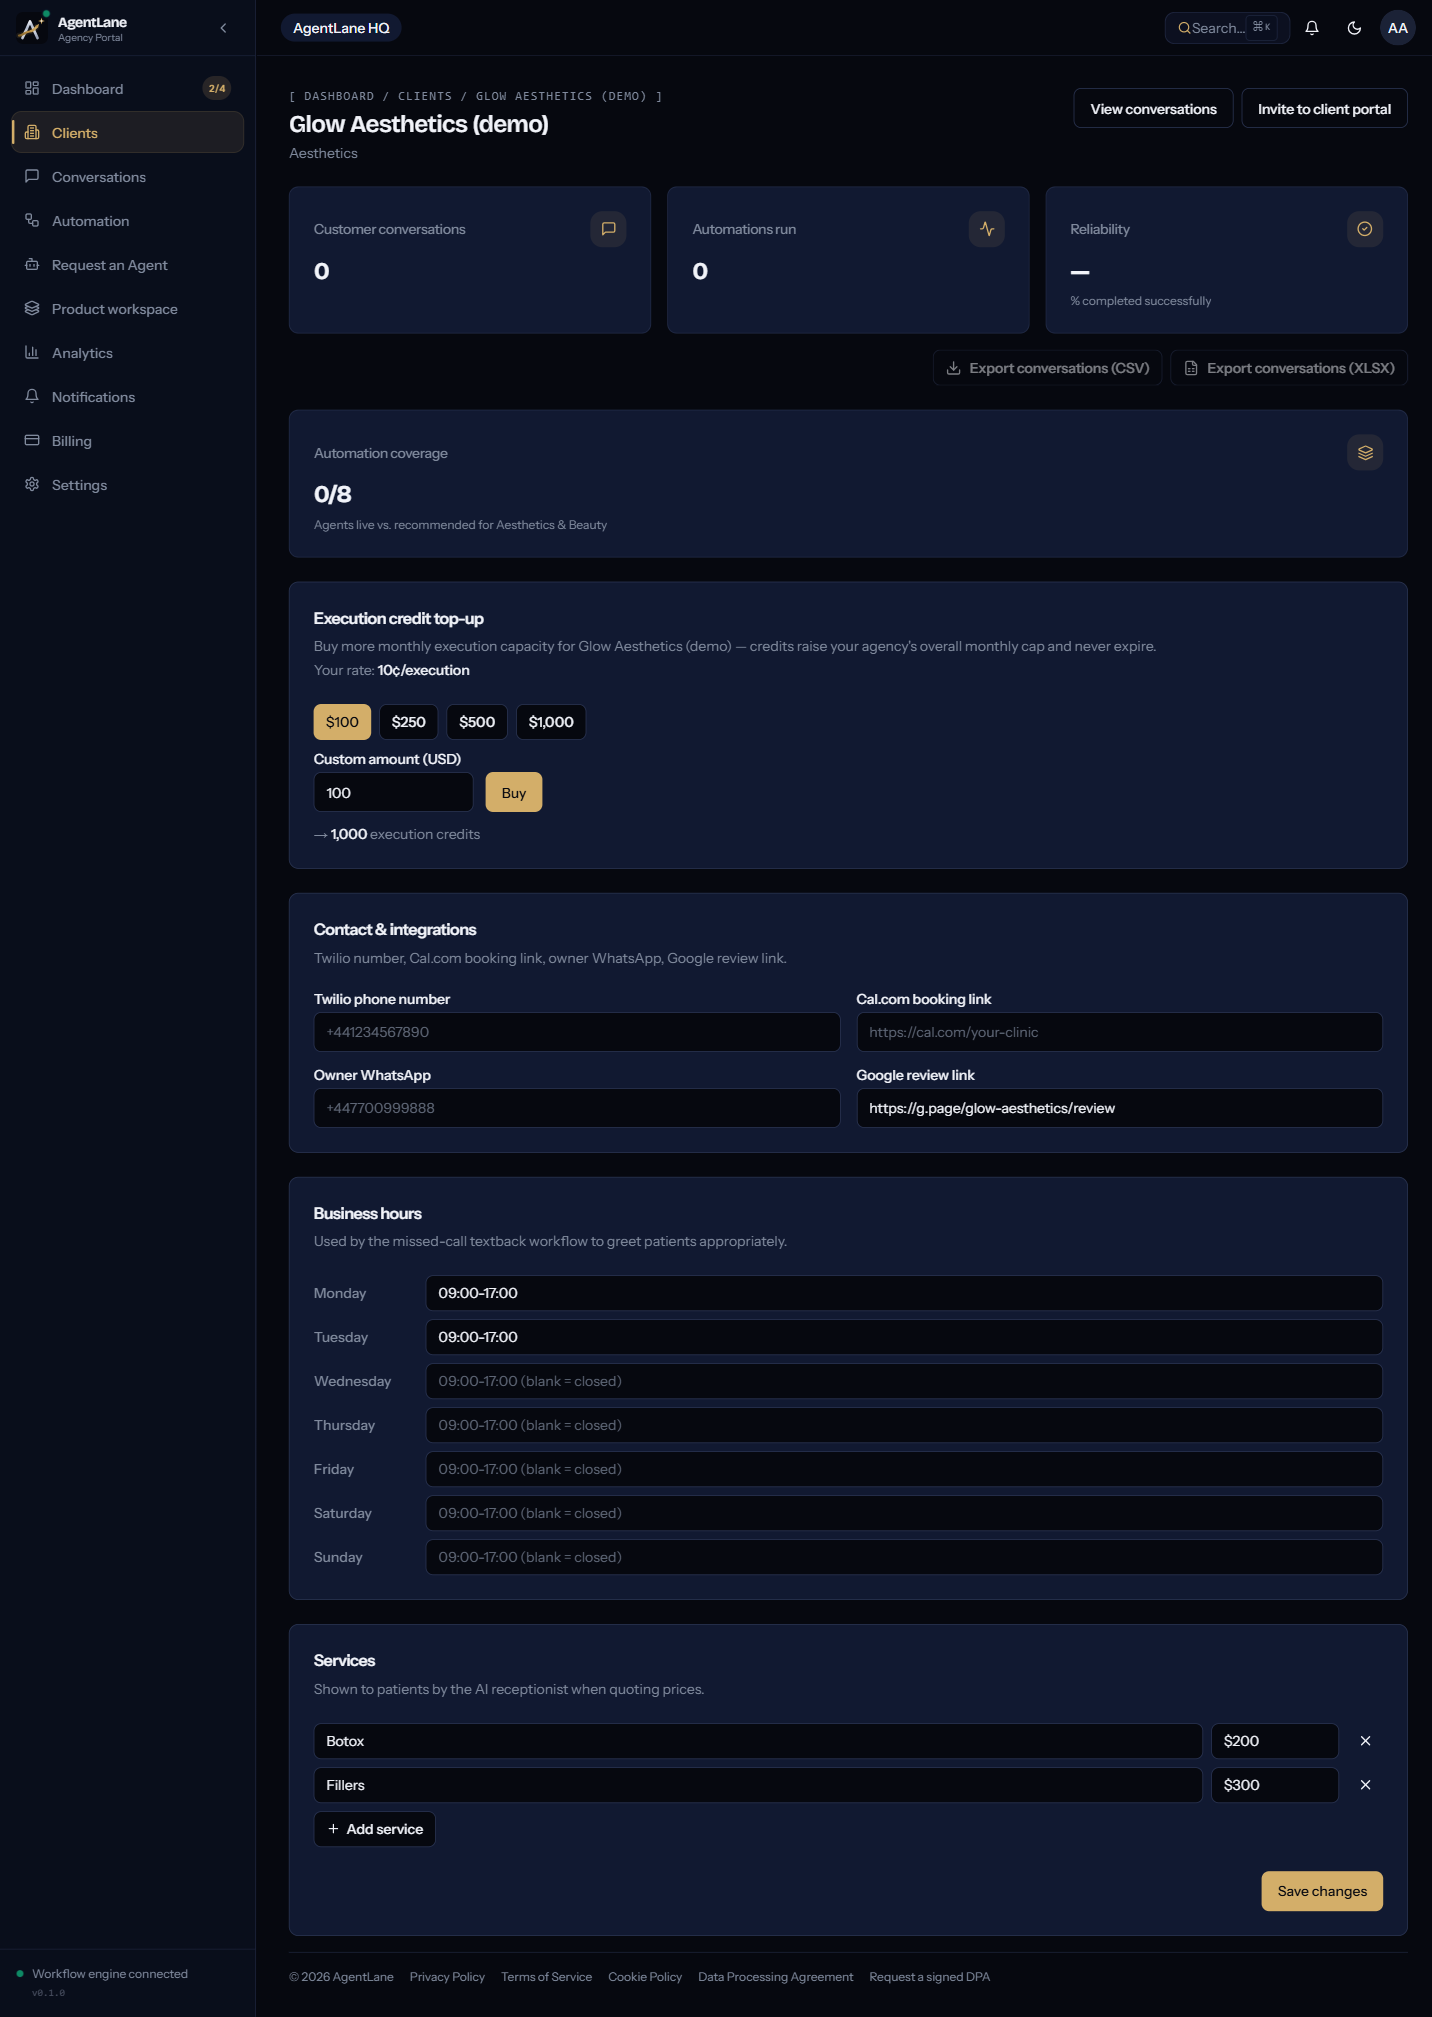
Open the client you just created (/dashboard/clients/[id]). Under Business hours, set an open/close range per day in HH:MM-HH:MM format (e.g. 09:00-17:00) — leave a day blank to mark it closed. Under Services, add each service with a name and a price (e.g. “Consultation” / “$200”). These two fields are what the AI receptionist actually reads from when greeting a caller after hours or quoting a price — keeping them accurate matters more than almost anything else in this walkthrough.
Add contact and integration links
On the same client page, under Contact & integrations, fill in:
- Twilio phone number — e.g.
+441234567890 - Cal.com booking link — e.g.
https://cal.com/your-clinic - Owner WhatsApp — e.g.
+447700999888 - Google review link — e.g.
https://g.page/.../review
Click Save changes at the bottom of the Services card once you’re done — it saves business hours, services, and these four fields together.
Set agency-wide credential defaults
Before requesting an agent, make sure your agency has default credentials configured — go to Settings → Integrations (/dashboard/settings/integrations) and set your Anthropic/OpenAI key (skipped entirely on Managed AI plans), Twilio, Cal.com, and Resend. See Connect your integrations for the full walkthrough if you haven’t done this yet.
Understand the credential waterfall
A credential resolves in this order for a given client: that client’s own credential (if they’ve set one in their own Settings → Credentials) → your agency-wide default (Settings → Integrations) → AgentLane’s own platform key, but only for anthropic and openai, and only if neither of the first two is set. Every other provider (Twilio, Cal.com, Resend, Postgres) must be BYOK at either the client or agency level — there’s no platform fallback for those. This is why the request-agent dialog below can show a credential as “Configured” even if you never typed anything into it directly.
Open the agent catalog
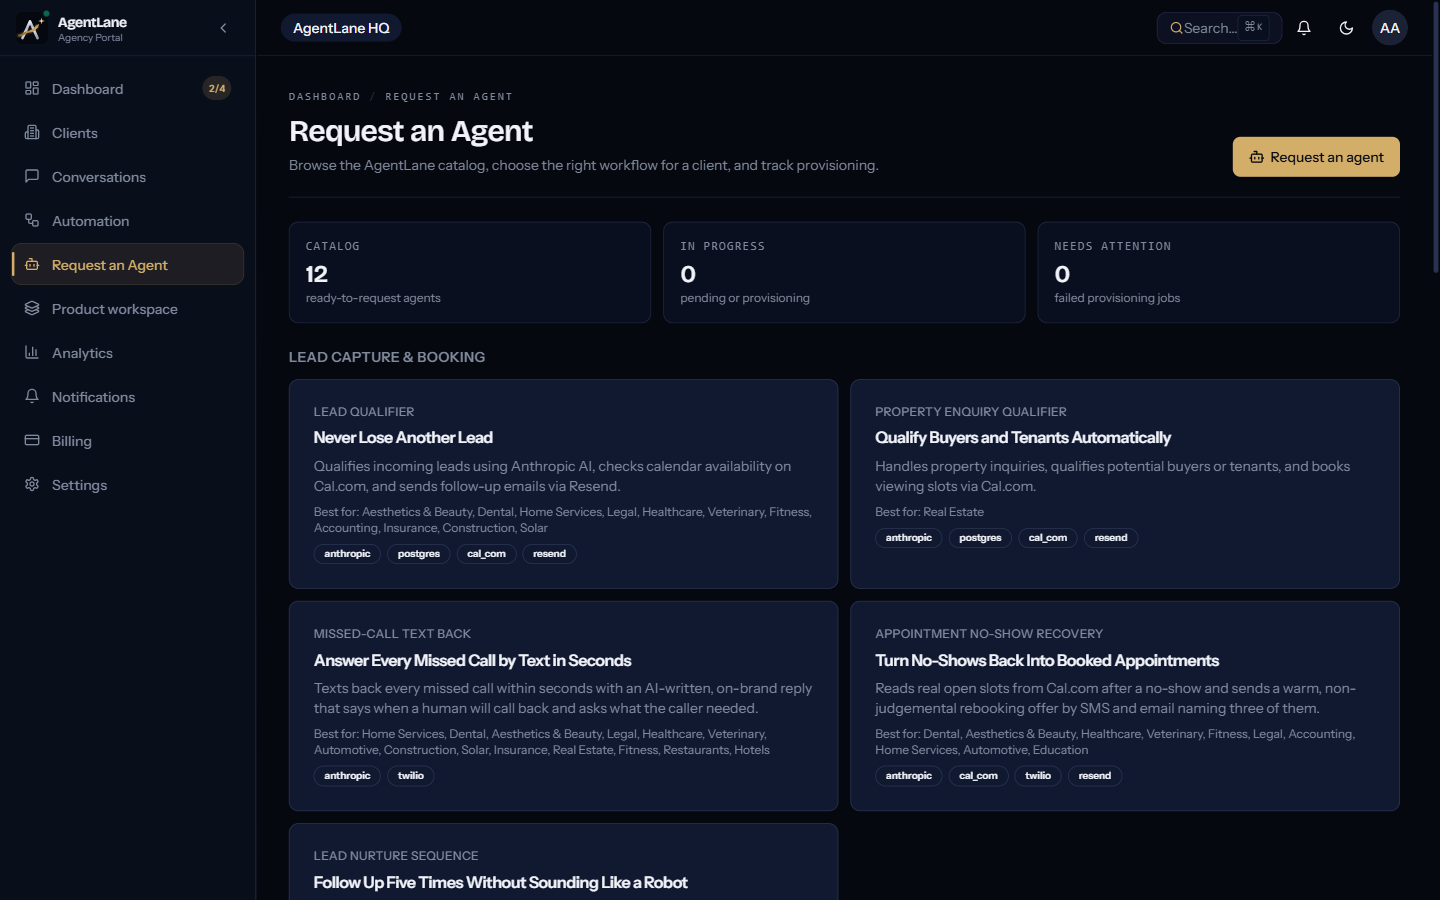
Go to Request an Agent (/dashboard/agents). Agents are grouped by category — Lead Capture & Booking, Reputation Management, Sales & Quoting — each card showing its headline, description, best-fit industries, and required credentials.
Request the Lead Qualifier
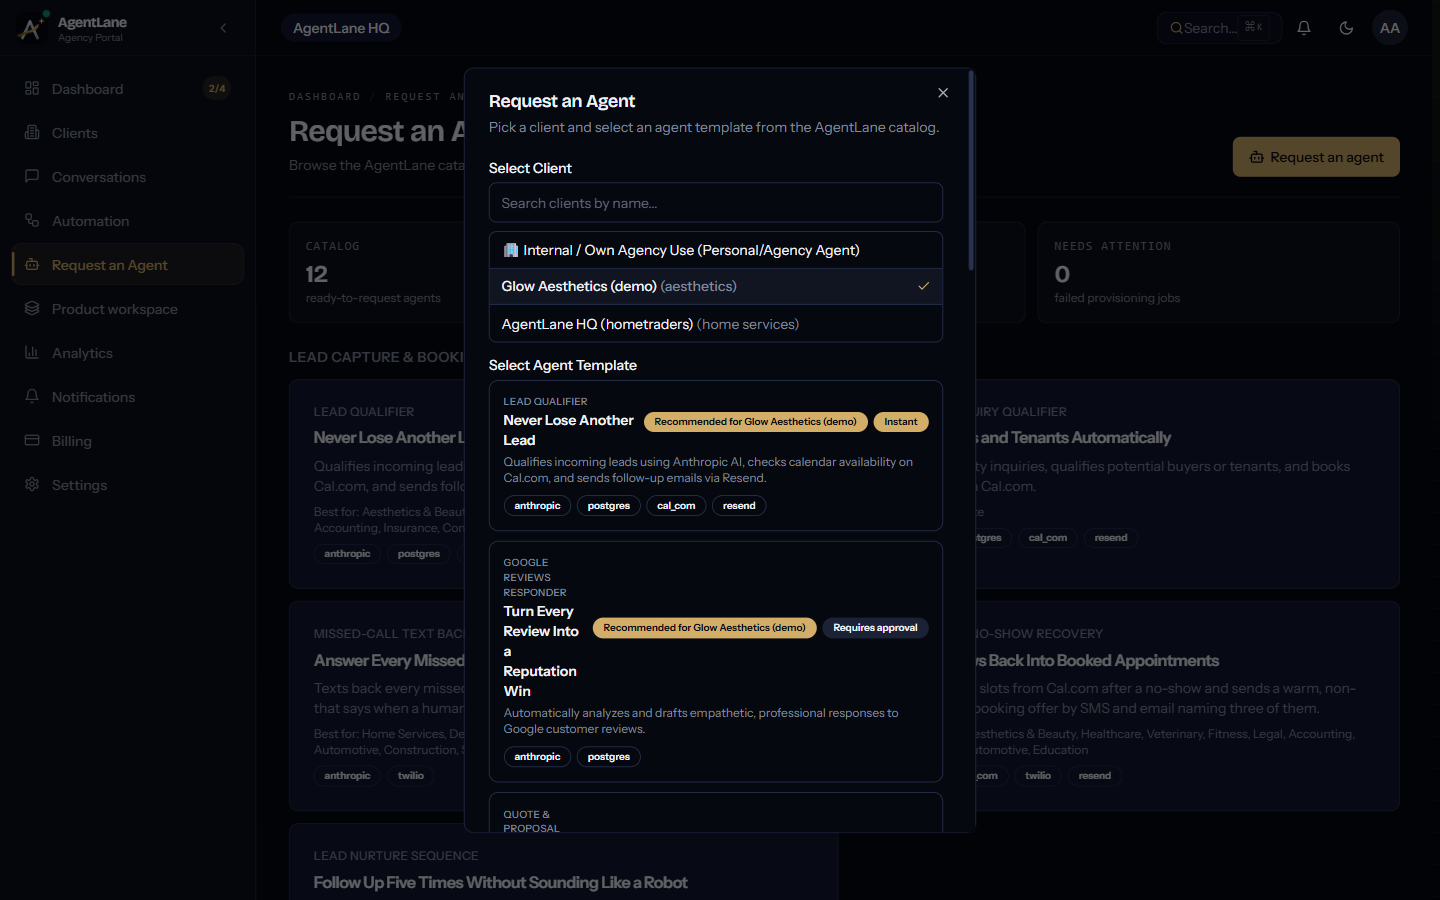
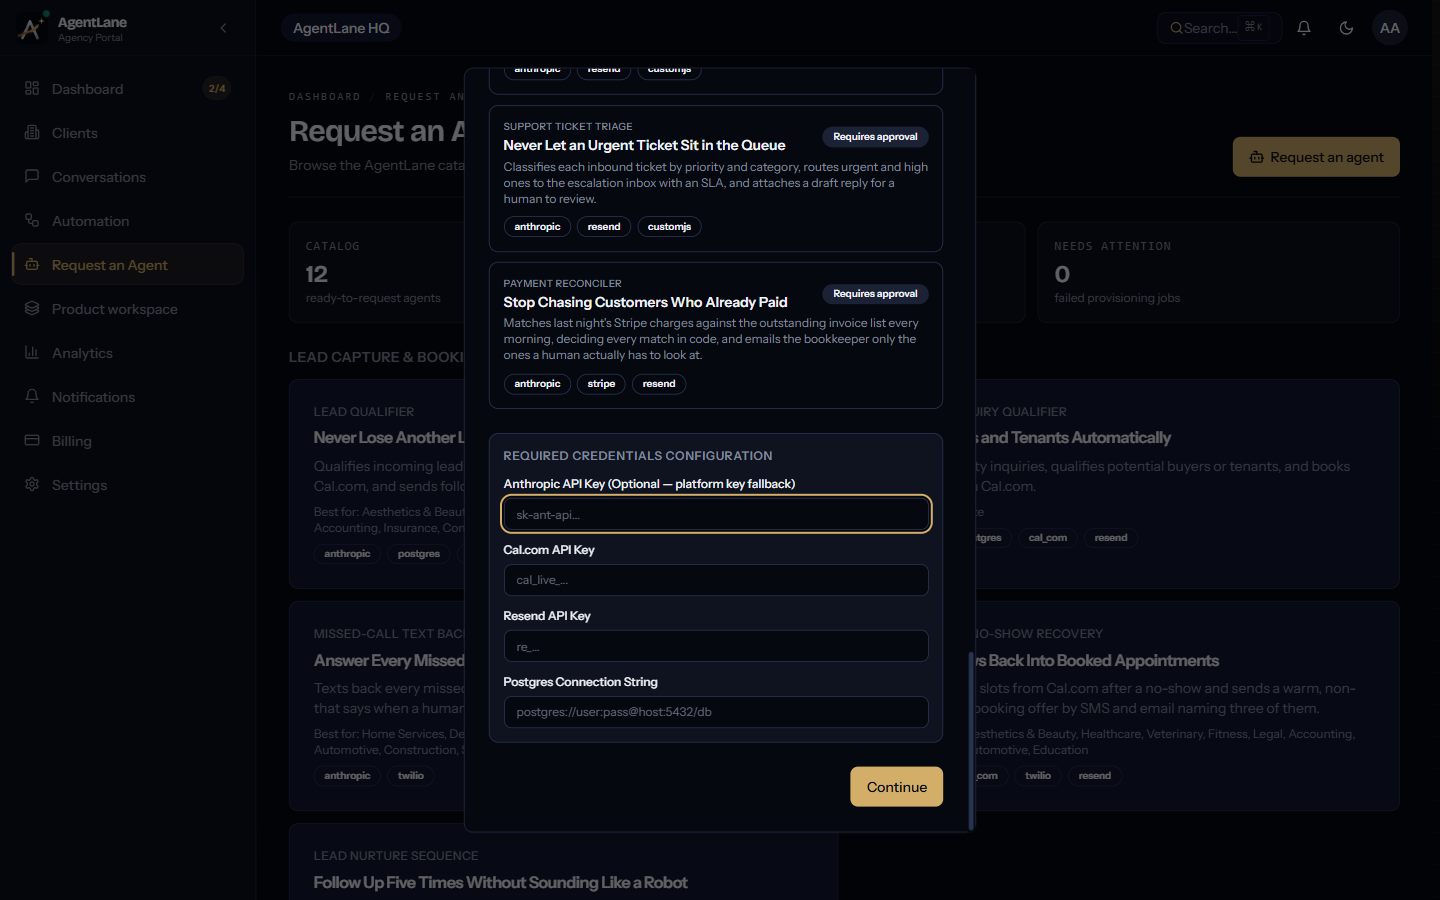
Click Request an agent. In the dialog’s first step, search for and select your client, then select the Lead Qualifier card — if the client’s industry matches the agent’s fit list, it’s flagged “Recommended for [client name]”. Any credential fields the agent needs that aren’t already configured appear inline right there (Anthropic key, Cal.com key, Resend key, Postgres connection string) — you can fill them in now or leave them and configure them agency-wide later.
Click Continue. Step two shows your own plan’s per-agent-client fee (for example $249/month on Launch and Professional, $199/month on Scale — it is read from your plan, not a flat catalog rate, and an additional agent for the same client is 50% off), a Required Credentials checklist marking each provider Configured or Missing, and the workflow that will be imported. If anything is missing, a warning banner explains what happens next: for the Lead Qualifier specifically (the only catalog agent with instantProvisioning: true), provisioning will fail until it’s resolved; for every other agent, you can still submit and AgentLane will flag it during review.
Click Submit Request.
Watch the request status
Because Lead Qualifier is the instant-provisioning agent, your request starts provisioning immediately — you’ll see a toast confirming that, rather than “AgentLane will review and fulfill it” (the message every other agent gets, since those go through manual staff approval first). Track it under Your requests at the bottom of the same page:
pending ──► provisioning… ──► fulfilled
   │
   └──► (rejected by AgentLane staff, with a note — non-instant agents only)

provisioning… ──failure──► provisioning_failed ──Retry──► provisioning…
If it lands on provisioning_failed, the row shows a client-safe error message (e.g. “Twilio credential invalid — verify your SID and Auth Token”) and a Retry button — no need to file a new request. See Provisioning failures for what each failure message actually means and how to fix it.
Verify the workflow instance
Once fulfilled, go to Workflows (/dashboard/workflows) and confirm the new Activepieces
instance shows Active and Tracked. The Workflow instance card at the top shows overall
connectivity — click Re-check health to re-run it on demand.
Connect it and send a test event
On the Workflows page, click Connect on the new workflow. The dialog shows the agent’s public ingest URL (copy it into whatever system sends the events — a phone system, a form, a CRM; see the API reference) and a Send test event button that fires one synthetic event at the agent right away.
Then generate a real run: call or text the client’s Twilio number, or trigger whatever inbound event the agent listens for. Open Executions (/dashboard/executions) — the new run appears in the real-time feed with a status (Pending/Running/Success/Failed). Expand it to see the execution ID and its raw output payload; this is the fastest way to catch a misconfigured integration before the client notices.
Invite the client to their portal
Back on the client’s detail page, click Invite to client portal, fill in their name and email, and send it. They’ll get a link to set up a scoped login where they can see their own conversations and, if they want, override any of your agency’s default credentials with their own — see Invite a client to their portal.
Check Analytics after a week
Once the agent has been live for a few days, Analytics (/dashboard/analytics) turns real conversation volume into business-impact numbers: leads recovered from missed calls, appointments booked automatically, staff hours saved, and average response time.
What to do next
Common problems at this stage
The “Request an agent” button is greyed out or missing.
Your account has the agency-scoped moderator permission, not admin — moderators get full read visibility but can’t submit requests, save config, or spend money anywhere in the dashboard. Ask an admin teammate to either submit the request or promote you from Settings → Team.
The request is stuck on provisioning_failed.
Open the request row — the note column shows a client-safe reason (e.g. an invalid Twilio SID/token, an unreachable Postgres connection, or a rejected Anthropic key). Fix the underlying credential in Settings → Integrations (or the client’s own Settings → Credentials, if they override it), then click Retry. See Provisioning failures for the full list of failure messages.
The agent shows Active, but no executions ever show up. The workflow instance is live, but nothing is triggering it — almost always because the client’s Twilio number isn’t actually pointed at AgentLane’s webhook yet (a Twilio-side configuration step, not a Portal one), or the number saved on the client’s detail page doesn’t match the number that’s actually receiving calls/texts. Double-check the Twilio phone number field against what’s configured in the Twilio console.
A booking never lands on the right calendar. This is almost always the credential waterfall resolving to the wrong Cal.com key — remember, a client-level override always wins over your agency default. If the client has (or used to have) their own Cal.com credential set in their own Settings → Credentials, that’s the one being used, not your agency default. Check there first before assuming your agency-wide key is broken.